Would you like to hide those hot water radiator covers in your home and have them instead look like a window seat/shelf?
#DIY #DIYprojects #womenempowerment #projects #weekend
#DIY #DIYprojects #womenempowerment #projects #weekend
Materials:
1- 3/4" 2'x 4' Plywood
2- 1/2" 2'x4' Plywood
Wood Glue
Pre Glued Veneer Edging
Finish Nails
Tools I used:
Table Saw
Hammer
Air Gun
1" air gun nails
Cut List:
3/4" Plywood:
1. Top. Cut your 3/4 Plywood into two lengthways so you have a 1'x4' piece.
1/2" Plywood:
2. Cut 2 - 11" x 21" Sides
3, Cut 2- 3" x 3' Front - top and bottom
4. Cut 1- 3" x 4' Back Brace
5. Cut 2- 5"x 21" Front sides
6. Cut 14- 2" x 18" Front Slats
After cutting all your wood, it's time for Assembly. Read all instructions first before starting.
Assembly Instructions:
1. Join your Sides (2) and your Front Sides (5), first glue, hold and nail with air gun, then lay these down front facing down.
2. Put the 2 Front - top and bottom (3) face down between the Front Sides so you can align and form the front. I put the bottom (3) piece at the bottom of the Sides (2) and the top (3) piece 1" from the top as I wanted to leave space for the air to escape. Glue the 3" that attach to the Sides (2).
3. Slats (6). Next is the 14 slats. Position the slats evenly along the top and bottom (3) pieces so they are facedown to form the front panel. The first and last slats I left 1" overhang onto the Sides (2) as this is what holds the front pieces together. Hammer finish nails to affix the first and last slat to the sides. I did not glue the slats down. I used 1 finish nail at each end of each slat. Now you have formed the front and sides. Pick up your piece and stand it up.
4. Top (1). Next is joining the Top (1) to the front/sides. Position the top so it is flush with the back, no overhang in the back. Leave equal overhang on each side. Glue on top of the Sides (2) and Front Sides (5) and place your 1"x 4' Top on and then nail it down along the sides.
5. Back Brace. Take your Back Brace (4) and position it 5" from the top. Measure the distance and cut the 3" x 4' piece to the correct size and trim the excess off, glue and use your air gun to nail this piece in.
Optional: You can use 2 braces on the back if you wish, I just did 1.
6. Veneer. Heat up your iron and use it to glue the pre glued veneer along the front and 2 sides of the Top.
7. Foil. You can put tin foil on the inside top to reflect the heat away from the wood.
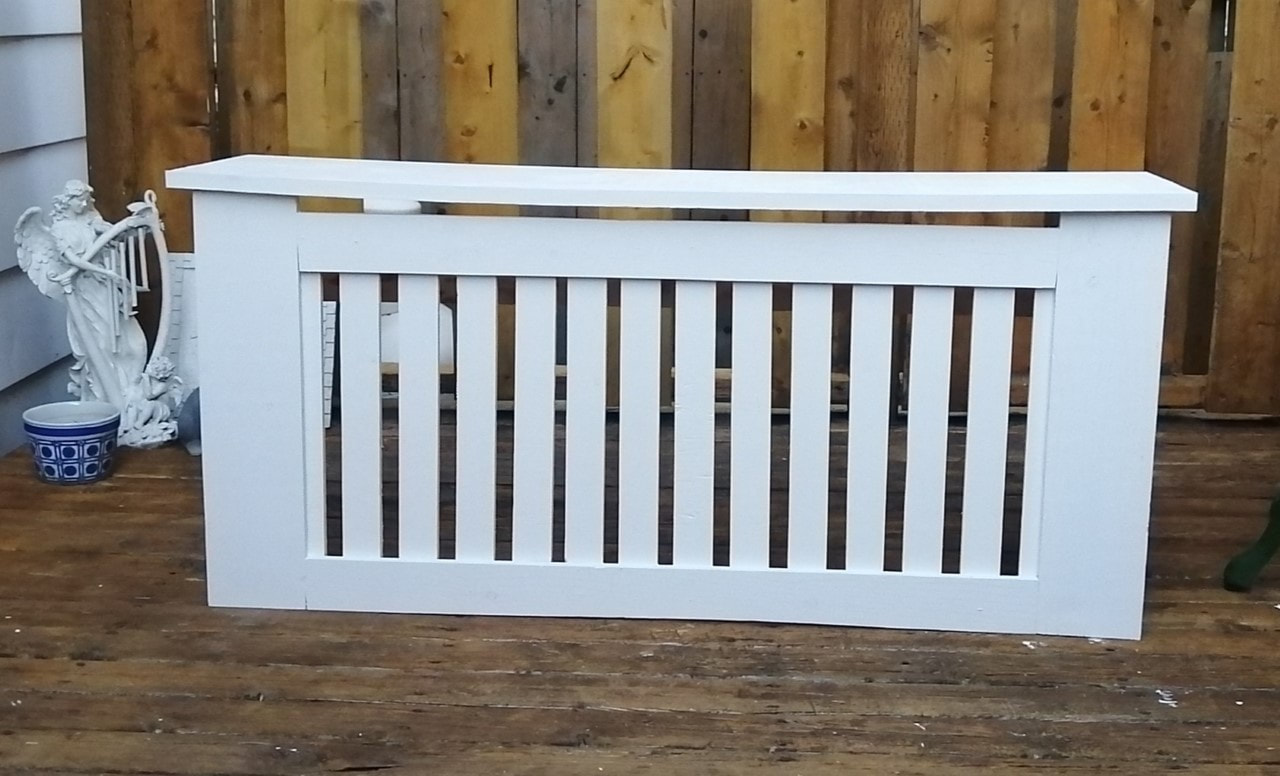
8. You are now done building your Radiator Cover! Hooray! Now you can decide if you want to stain it or paint it. I painted mine white.
Voila! You are done! Enjoy your Radiator Cover that you can use as a shelf but remember it will get hot so keep things on it that can get hot.
Cheers,
Lisa
Maria Lisa Polegatto
www.marialisapolegatto.com
#DIY #DIYprojects #womenempowerment #projects #weekend
1- 3/4" 2'x 4' Plywood
2- 1/2" 2'x4' Plywood
Wood Glue
Pre Glued Veneer Edging
Finish Nails
Tools I used:
Table Saw
Hammer
Air Gun
1" air gun nails
Cut List:
3/4" Plywood:
1. Top. Cut your 3/4 Plywood into two lengthways so you have a 1'x4' piece.
1/2" Plywood:
2. Cut 2 - 11" x 21" Sides
3, Cut 2- 3" x 3' Front - top and bottom
4. Cut 1- 3" x 4' Back Brace
5. Cut 2- 5"x 21" Front sides
6. Cut 14- 2" x 18" Front Slats
After cutting all your wood, it's time for Assembly. Read all instructions first before starting.
Assembly Instructions:
1. Join your Sides (2) and your Front Sides (5), first glue, hold and nail with air gun, then lay these down front facing down.
2. Put the 2 Front - top and bottom (3) face down between the Front Sides so you can align and form the front. I put the bottom (3) piece at the bottom of the Sides (2) and the top (3) piece 1" from the top as I wanted to leave space for the air to escape. Glue the 3" that attach to the Sides (2).
3. Slats (6). Next is the 14 slats. Position the slats evenly along the top and bottom (3) pieces so they are facedown to form the front panel. The first and last slats I left 1" overhang onto the Sides (2) as this is what holds the front pieces together. Hammer finish nails to affix the first and last slat to the sides. I did not glue the slats down. I used 1 finish nail at each end of each slat. Now you have formed the front and sides. Pick up your piece and stand it up.
4. Top (1). Next is joining the Top (1) to the front/sides. Position the top so it is flush with the back, no overhang in the back. Leave equal overhang on each side. Glue on top of the Sides (2) and Front Sides (5) and place your 1"x 4' Top on and then nail it down along the sides.
5. Back Brace. Take your Back Brace (4) and position it 5" from the top. Measure the distance and cut the 3" x 4' piece to the correct size and trim the excess off, glue and use your air gun to nail this piece in.
Optional: You can use 2 braces on the back if you wish, I just did 1.
6. Veneer. Heat up your iron and use it to glue the pre glued veneer along the front and 2 sides of the Top.
7. Foil. You can put tin foil on the inside top to reflect the heat away from the wood.
8. You are now done building your Radiator Cover! Hooray! Now you can decide if you want to stain it or paint it. I painted mine white.
Voila! You are done! Enjoy your Radiator Cover that you can use as a shelf but remember it will get hot so keep things on it that can get hot.
Cheers,
Lisa
Maria Lisa Polegatto
www.marialisapolegatto.com
#DIY #DIYprojects #womenempowerment #projects #weekend